
 Find a Garden

 What's New

 Our Impact

 Join
Join
Dividing herbaceous perennials in the spring
Time to get some spring in your step!
Herbaceous division to create healthy new plants and give new life to your borders
With huge thanks to Ann Burns for this article to inspire us all to get outside and start dividing our herbaceous perennials – a satisfying and rewarding way to create new plants for free and get a bit of exercise along the way!
The warmer weather encourages the spring flowering bulbs out, the tree buds start to fatten up and the winter-lazy amongst are once again champing at the bit to get out and get on in the garden. During last summer we realised just how overgrown and scruff the main herbaceous planting in the garden was looking – sorting it out is a job that we have earmarked for this spring. The end of March/beginning of April is the time when herbaceous perennials start into their most vigorous growth and is therefore the best time for lifting and splitting those plants as they are quite literally desperate to grow.
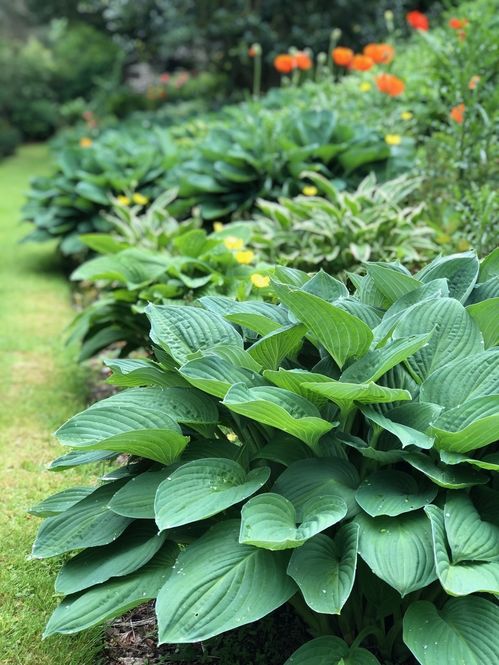
So why and how do we divide these plants? Herbaceous plants may need divided when their growth becomes congested; the centre of the plant may even die out (the ‘polo mint’ effect) as the plant gets older. Aster and Helenium, for example, should be split every three years to keep them healthy. Alternatively, we may choose to divide clumps simply because we want more plants. Many herbaceous plants will thrive for years with no division at all, for example, Hosta and Geranium.
So, identify any plants you want to work with and:
Cut back any dead foliage or flowers left over from last year close to the ground, taking care not to damage any new shoots and buds. Scissors make short work of slimy dead foliage, easier than secateurs for this job.
Using a spade, lift the whole plant from the ground and lay it onto a firm surface. Use an old sheet if you’re working on the patio and you’ll have much less tidying up to do at the end.
Decide how many new plants you want to produce and what size these should be. If you only need a few plants the sections can be quite large; smaller pieces when split must have at least one bud and some root attached.
Divide plants using a sharp spade, carefully placed between the buds, or use an old bread knife to cut through the plant on smaller more delicate specimens. Be very careful if you choose to use the back-to-back two fork method, as this can easily damage buds (not to mention the gardener). Discard the oldest central part of the plant.
Replant new divisions in the garden to the same depth as that from which you lifted them, or put them aside for potting up later. Avoid replanting any plant in the same space it was lifted from. Plant elsewhere in the bed and you will produce a much healthier plant.
Always reinvigorate the soil where you are replanting with homemade compost or some well-rotted manure or leaf mould. Add a small handful of general slow release fertiliser, such as bone meal, around the newly divided plant. It might sound mad but even in damp weather you should water in your newly replanted clumps well, as the water will help to settle the soil in close to the roots. Some examples:
Snowdrops: Lift the whole plant, gently pull the bulbs apart with your hands, replant clumps of around five bulbs leaving the leaves intact.
Deciduous grasses such as Miscanthus and Calamagrostis: cut back to within a couple of inches of ground level, use an old bread knife to split the clump then replant.
Hostas have a solid fleshy crown between the buds and the roots which is best cut with a sharp spade or knife.
Many mat–forming perennials with overground stolons such as Persicaria affinis or Stachys byzantina will simply pull apart once the overground stems are cut with secateurs.
Water Lilies: lift the whole plant from the pond. Using a sharp knife cut through the rhizomes, retaining 10 to 15cm long sections with outward facing buds and trim the roots to around 15cm length. Replant the sections, one per 20cm pond basket, using aquatic compost.
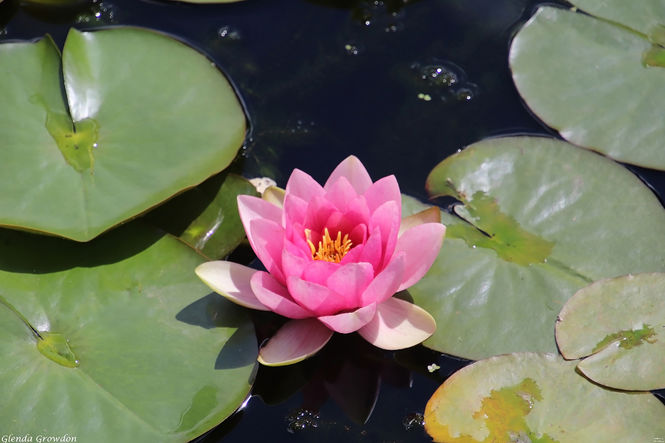 Shepherds House Water Lily ©Glenda Growdon
When you have done all the work above you are likely to have many small bits of plants left over – perfect for potting into multi-purpose compost, labelled and grown on for a few weeks in a bit of shelter. These will make a great addition to the sale table at your next Garden Club meeting or Garden Opening Plant Sale!
Remember too that we should support our Scottish Plant Growers and make sure you visit your local nurseries for one or two new herbaceous beauties each year. We have some fantastic growers and breeders on our doorstep and you can always be assured that a Scottish-grown plant is going to thrive in your garden.
Ann Burns
Ann is a former lecturer in horticulture at SRUC.
With thanks to Ann and the Scottish Gardeners’ Forum for their kind permission for republishing this article.
Find out more about the Scottish Gardeners’ Forum here